One of my favorite places as a child was the garden, with my grandma. She had a massive piece of land dedicated to growing everything from turnips to strawberries, in addition to multiple fruit trees.
Needless to say, my grandmother grew up living primarily from the land, as they had little money. I spent many hours with her, learning how to grow fruits and veggies and then preserve them. I’d love to share some of what I’ve learned with you. So my post today is dedicated to growing tomatoes.

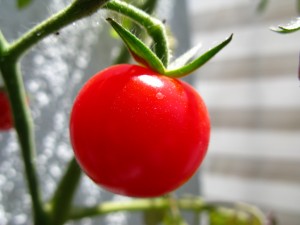
I love garden tomatoes. Honestly, when summer comes to mind, one of the first things I think about is a nice, juicy tomato, fresh from the garden. It’s nothing like its store-bought cousin. My grandma calls those bought in the grocery store “hot-house tomatoes.” They are grown in an artificial environment and picked when they are still green, as they will be transported all over the country to sell. They will ripen in transport, and therefore, get all mushy and flavorless.
A REAL tomato takes weeks to grow and then ripen slowly and carefully in the sun. When it’s done, it is a thing of beauty. I like to slice one, drizzle it with a little olive oil, balsamic vinegar, add a some fresh garlic and a slice of fresh mozzarella. Oh my goodness. It’s my favorite summer treat.

So let’s talk about growing them. Tomatoes are pretty easy. I say this after strangely cold weather and my giant labrador puppy destroyed a large number of my tomato starts this season.
This year, instead of doing what I do every other year which is run to Wal-Mart and buy the biggest plants I can find, I decided to be adventurous and go the “heirloom route.” I used Baker Heirloom Seeds, and did all my shopping online. I chose heirloom seeds as I prefer to think of them as originals….not genetically modified.
The tomato varieties I chose were Basrawya, Brandywine, Solar Flair, Glacier and A Grappoli D’Inverno. I thought I was up for the challenge, but I will tell you…heirloom varieties require attention. It’s not gardening for the faint-of-heart. But the rewards are great.
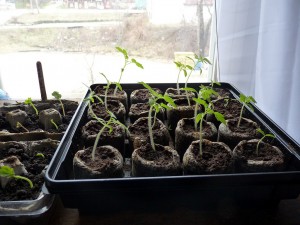
I started my seeds in my gardening room. I use small cardboard pots that you can get at any store with gardening supplies. You can make your own, but I have not attempted this yet. I figure it is just pushing my luck to go all-out DIY. I know my limits.
I fill the small containers with garden mix, which is a soil mix that is optimal for starting seeds. I add 1-2 seeds to each container, and then I place all my pots in a damp, dark place until they germinate.
Once the seeds are sprouting from the pots (usually about a week but can be sooner), I take them to a warm, sunny spot and water them regularly. You want to make sure you pots are able to drain nicely so you don’t get too much water in them.
You will see them grow big and strong over the next few weeks. As I prepare to transplant them in my garden, I actually sit them outside for periods of time. This process is called “hardening off” the plants by exposing them to real sunlight, wind, rain, and cool evenings.
My tomato plants typically go in my raised beds, although I have some in the ground that are doing just as well. My raised beds provide a more controlled environment. I can put down newspapers, which serve as weed paper. They are environment-friendly and inexpensive and frankly work better than any weed paper I’ve ever used.
I do use a very rich, fertile soil mix for my tomatoes and I use some Miracle Grow when I plant the starts, just to boost fertilization and avoid some shock to the plant as it is transplanted. This year all my starts were successful when I transplanted. I think I deserve some kind of reward!
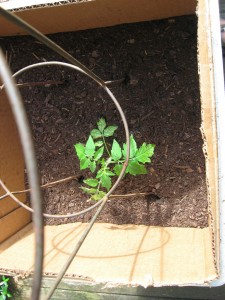
I plant tomatoes about 2-3 feet apart. They seem small when you put them in but trust me, they will grow quickly and you want each plant to have room. I place the newspapers in the beds, cover them with a bit more dirt, and then dig holes for my tomatoes.
When you place the plant in the hole, if you are concerned that it might have an inconsistent water supply, you can actually lay the root sideways in the hole, and then bend the stem upward as you plant it. This method will allow the roots to receive moisture closer to the surface and can help in dry conditions. Just be careful and you bend. The plants are pretty soft so it’s not difficult, but it would be a bummer to snap one in half….I say from experience.
After all are planted, I make sure adequate dirt is spread on the surface, and then I top the bed with mulch, which helps deter weeds and preserves moisture.
And now….it’s time to wait…..and wait….and wait. If temperatures are hot and your plants get an adequate water supply, they will grow like crazy. If not, growth will be slower. Don’t be discouraged, it is all in Mother Nature’s hands at this point. There is very little you can do besides a rain dance and a prayer.
As the plants begin to get bigger and stronger, you will need to have them in tomato cages to protect the delicate branches from snapping under the weight of the fruit. I actually place cages right after I plant them.
Another trick I learned from my grandmother is that you should always remove the “suckers” from the plant. Suckers are little branches that start to form between the main branches of the tomato plant. She always told me that the more suckers you allow to pull away from the main plant, the smaller and weaker your fruit will be.

So that’s my tomato planting instruction guide. Of course, as you begin to see your plants grow, you will deal with diseases, bugs, and all those fun things that want to destroy your tomatoes. There are millions of organic solutions on Pinterest. I have used some of them with success. There are also non-organic solutions at your local gardening store. You just have to follow your heart here and do what you can live with. I asked my husband to pee around the perimeter of the garden at one point to keep the deer away. Deer are my garden enemies. He gave me “the look” and sent me to Orscheln’s to buy some deer repellant.

I hope you try tomato gardening if you never have. I had my first harvest tonight, and the tomatoes I sliced for dinner were incredible….the taste of summer.

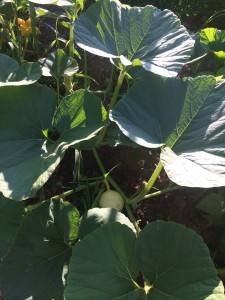
P.S. I am also working hard on the giant pumpkin, as promised. I have a couple of hopefuls. My plants are ginormous so hopefully, the pumpkins that follow will also be ginormous. Crossing my fingers.
Hugs and blessings always,
LITTLE JEN in the BIG WOODS